

In this article, we'll walk you through the process of crafting your job application tracker in Google Sheets. You can do it by following one of these methods:
- Creating a job application tracker in Google Sheets manually;
- Creating a job application tracker in Google Sheets, using Softr.
How to create a job application tracker in Google Sheets Manually
Time: 3 minutes
Cost: $0
If you prefer a hands-on approach, you can use this method to customize your job application tracker to your liking.
Step 1: Create a new spreadsheet in Google Sheets
Open a blank spreadsheet in Google Sheets, where you'll house your job application tracker.

Step 2: Set up the headers
In your newly created spreadsheet, set the headers that will serve to categorize the data of your job application tracker:
- Company: the name of the company you're applying to;
- Job Title: the title of the job you're applying for;
- Date Applied: the date you submitted your application;
- Location: the location of the job;
- Status: the current status of your application (e.g., applied, interview scheduled, and rejected);
- Contact Person: the name of the person you're in contact with at the company;
- Email: the email address of the contact person;
- Phone: the phone number of the contact person;
- Website: the company's website URL;
- Deadline: the application deadline for the job offer;
- Notes: any additional notes or details about the job offer or company.

Step 3: Enter your job application information
Enter your job application information by filling in the corresponding details for each job application.

Step 4: Format your sheet
Format your sheet for better readability and organization. You can bolden column text and apply different colors for rows with different statuses, for example, green for “interview scheduled, "red for "rejected" or Format the "Date Applied" and "Deadline" columns as dates for easy sorting and filtering.

Step 5: Add filters
Enable filters for your sheers to sort out and filter your job applications easily. To do this, click on the small filter icon that looks like a funnel in the column headers row. This will add filter options to each column header, allowing you to sort and filter your data as needed.

Step 6: Use conditional formatting
You can apply conditional formatting to automatically highlight certain cells based on criteria you set. For example, you could set up conditional formatting to turn the "Deadline" cell red if the deadline is close.

Step 7: You’ve created a job application tracker!
Well done! You’ve created a job application tracker in Google Sheets. As your job search progresses, remember to consistently update your tracker with new applications, interview dates, and any changes in application status.

How to create a job application tracker in Google Sheets, using Softr
Time: 3 minutes
Cost: $0
You can also use Softr to create your job application tracker. Softr is a no-code application that allows users to create web applications using their data in Google Sheets. The job application tracker you create with Softr is vastly more customizable than the one you can create solely using Google Sheets.
Step 1: Log in to Softr or create an account
First, you will need to log in to Softr. If you don’t have an account, you can sign up to Softr for free.

Step 2: Click on "New Application"
With your Softr account set up, it's time to create a new application where your job application tracker will be housed.
On your Softr dashboard, locate and click on the "New Application" button.

Step 3: Create a blank application
For the purpose of creating a job application tracker, it’s best to start with a blank application. To do so, click on the corresponding button.

Step 4: Add pre-built pages
Next, you have the option of adding pre-built pages to your application. Because all you want to do is to create a job application tracker, you can select only the first option and click on “Create application.”

Step 5: Delete the unnecessary blocks
Before you, you have a homepage. However, you don’t need it for the purpose of making a job application tracker, so you can delete all the pre-made blocks, by clicking on the bin icon of all blocks.

Step 6: Add a list with a columnar sliding card block
Now that the page has no blocks, click on “Add your first block.” This will open a sidebar on the right side of your screen, where you can search for a pre-made block called “List with columnar sliding cards.”

Step 7: Add a data source
After clicking on your newly created block, in the SOURCE tab, you will notice that you need to add a data source so that Softr can fetch your data from Google Sheets. To do so, follow the next steps.

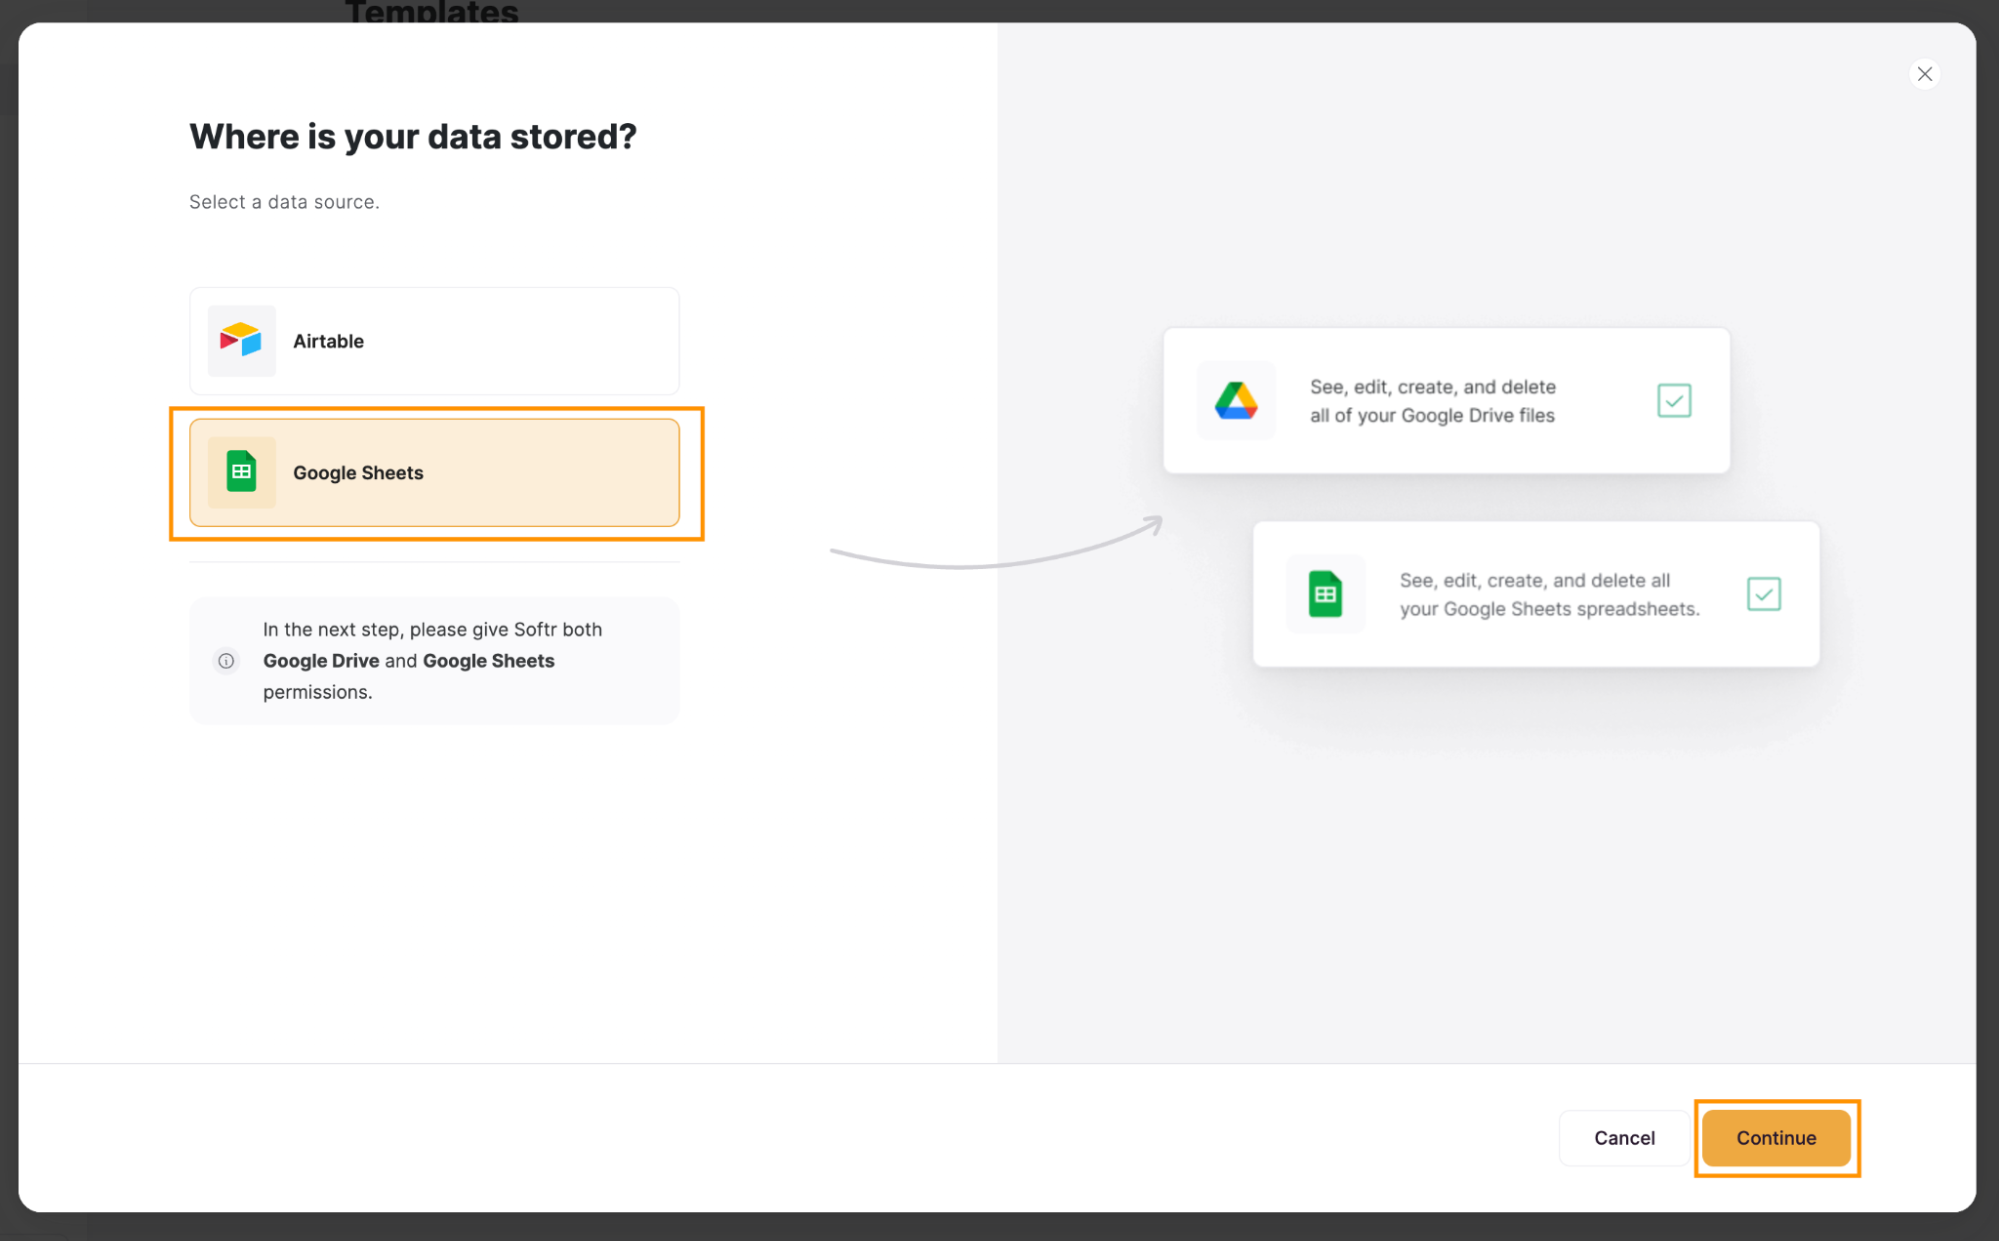
Step 7.1: Select Google Sheets as a data source
As your data is stored in Google Sheets, select “Google Sheets” and click on “Continue.”
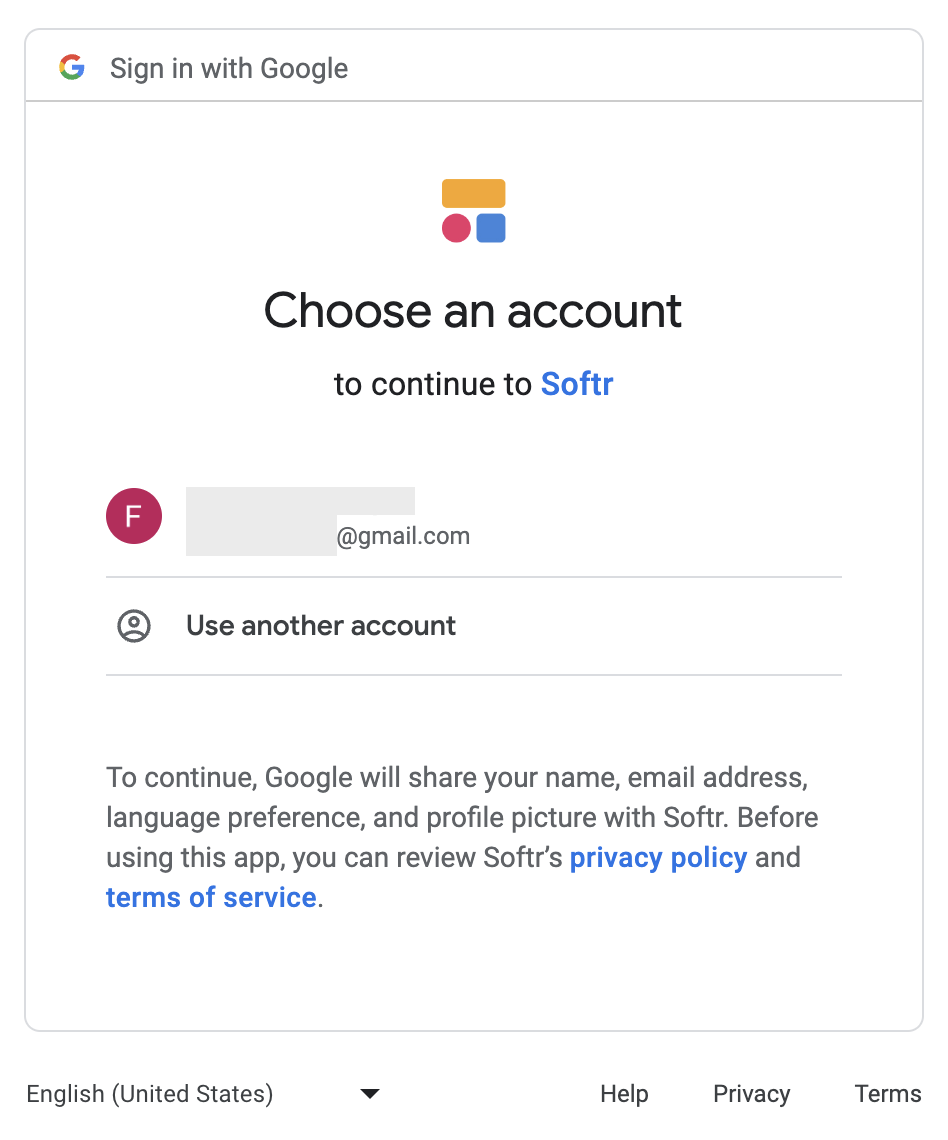
Step 7.2 Select a Google Account
A new window or tab will open for you to log in to or select your Google Account.
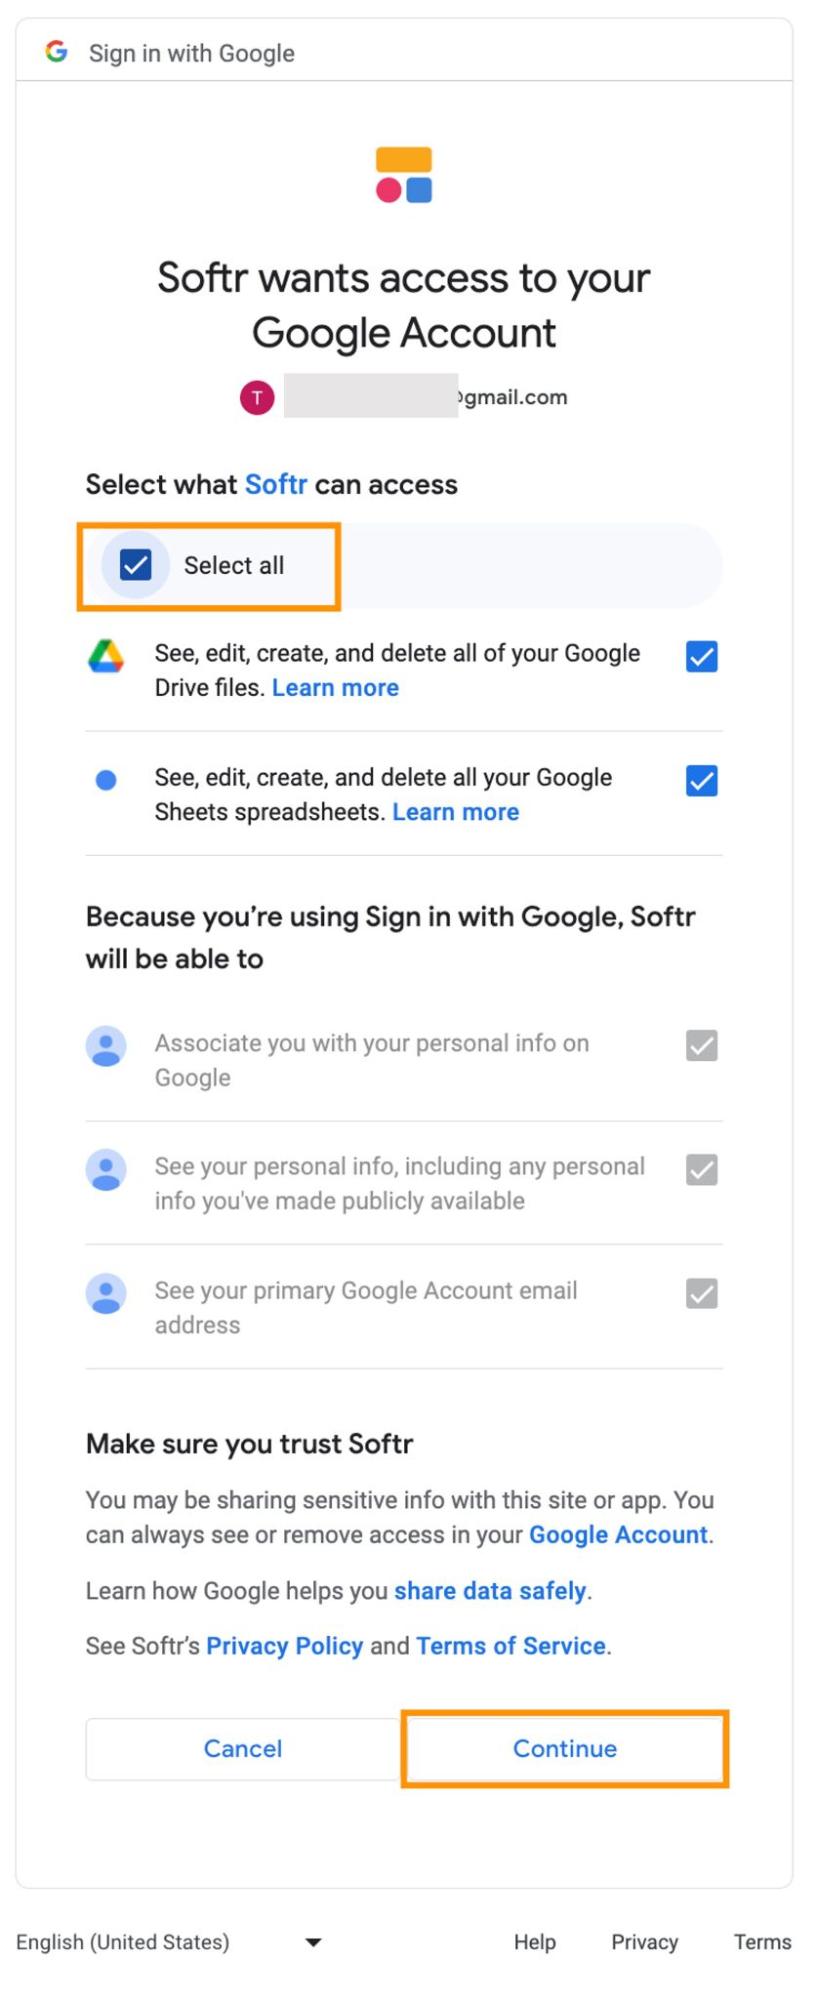
Step 7.3 Grant additional access
In this step, you’ll need to grant Softr access to a set of features. Click on "Select all" and then hit “Continue."
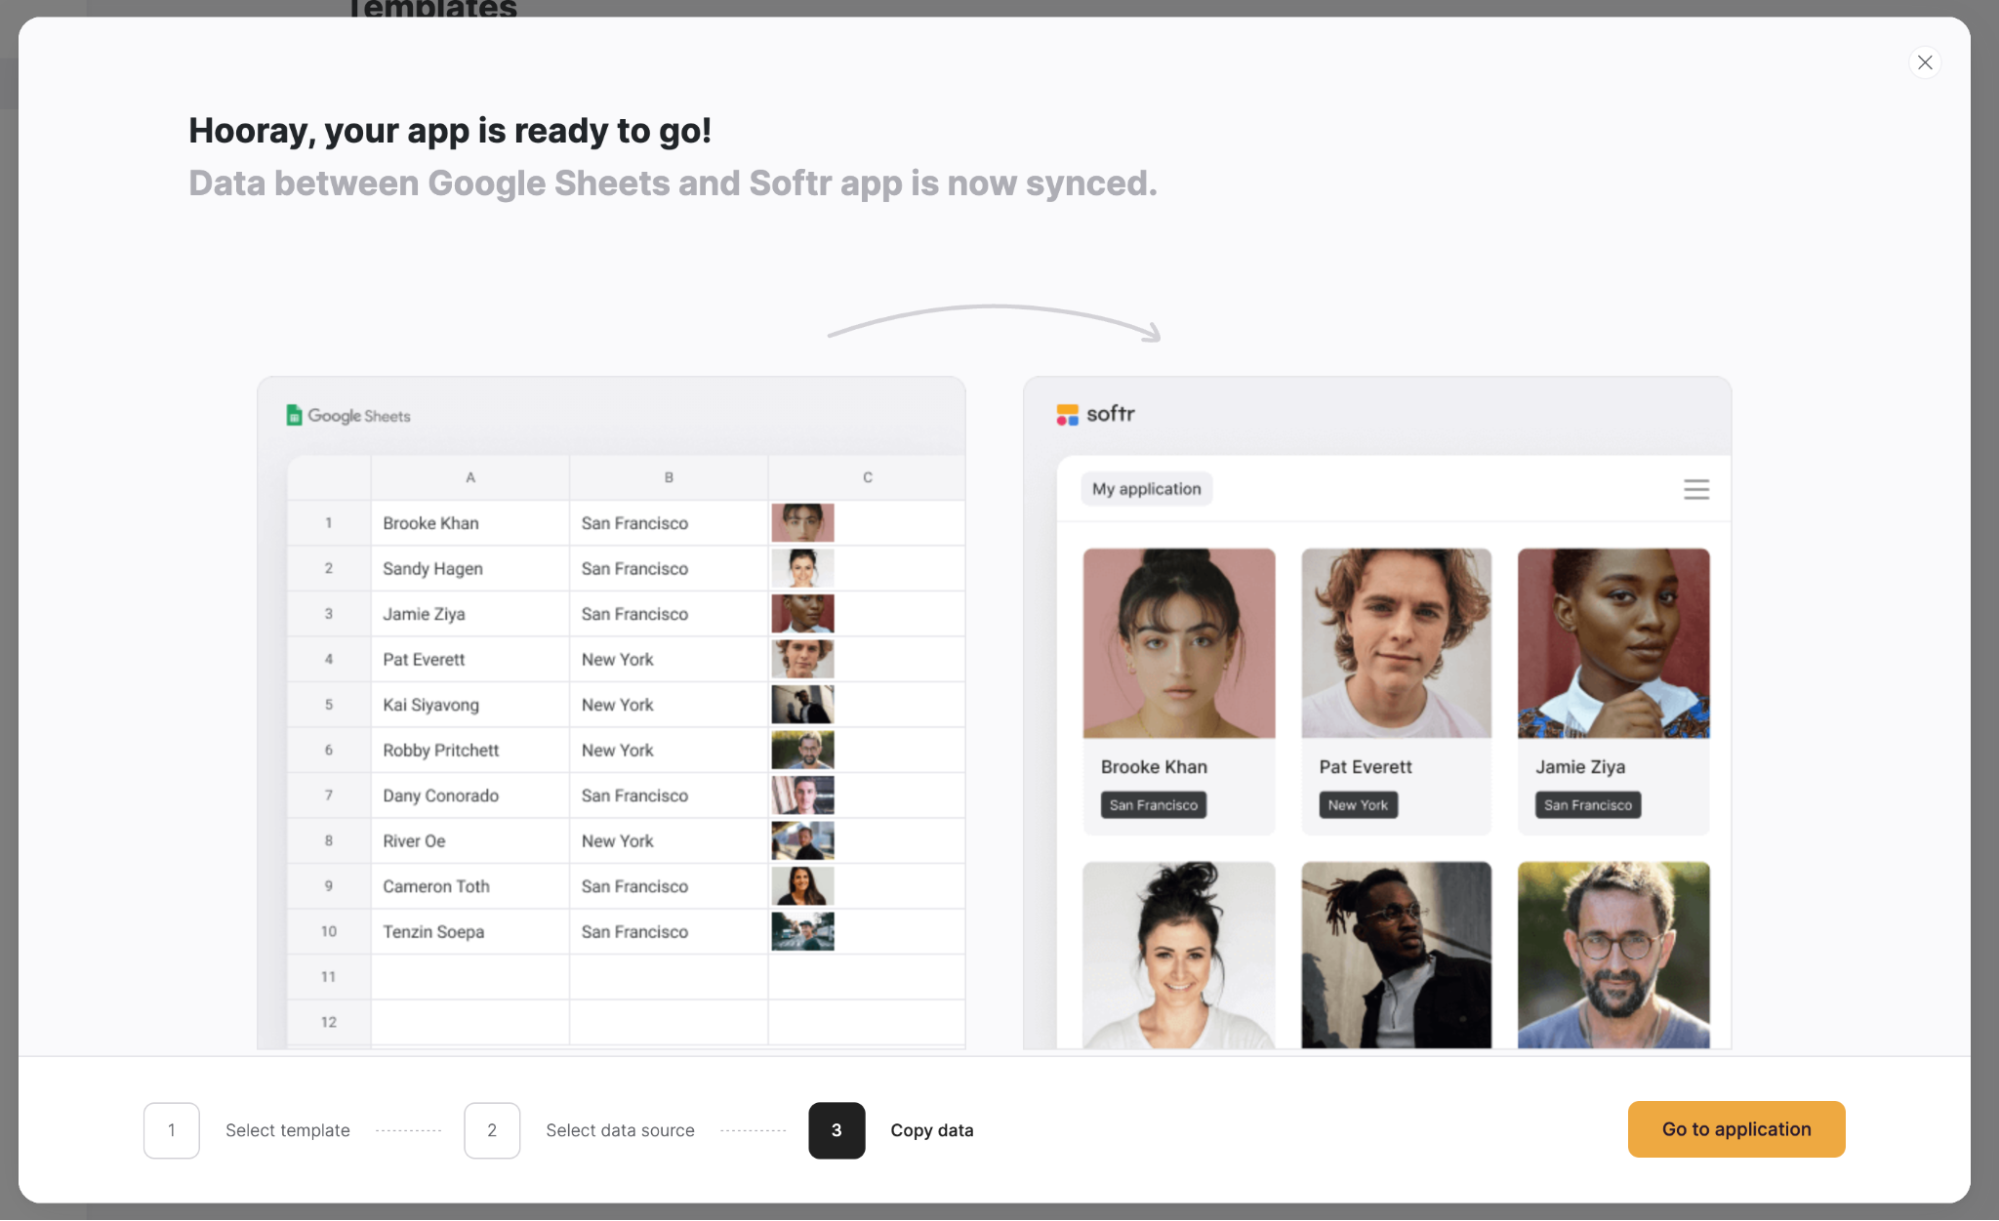
Step 7.4: Go to your app
Now that your Google account is connected with Softr, click on “Go to application.”
Step 8: Indicate the Google Sheets file where your data is stored
In order for the job application tracker to display the data you have stored in your Google Sheets file, you need to indicate where exactly that data is located. To do so, click on the list with columnar sliding cards block, in order to open a sidebar on the right side of your screen. There, you will need to select the spreadsheet and the sheet where your data is by clicking on the "Document" and "Sheet" options.

Step 9: Map the fields
Next, you need to indicate which data field in your Google Sheets file corresponds to what information. You can do this in the CONTENT tab, under the ITEM FIELDS heading.

Step 10: Style your job application tracker
Softr allows you to style your job application tracker in a few ways.
Step 10.1: Customize Padding and Margins
To customize the padding at the top and the bottom of your block, go to the STYLES tab and adjust either padding under the PADDINGS & MARGINS heading.

Step 10.2: Customize Border
By scrolling down in the STYLES tab, you can find the General section. There, you can customize the block’s background color, as well as the color, type, and thickness of the borders.

Step 11: Adjust access permissions
You can choose to control who has access to your job application tracker. You can allow either all users, logged-in users, or non-logged-in users. You can adjust this setting in the VISIBILITY tab.

Step 12: Save your changes
Once you've configured your job application tracker, you need to save your changes, so that it’s accessible to other users. You can do so by clicking on “Publish” in the top right corner of your screen.

Step 13: You’ve created a job application tracker
By combining Google Sheets and Softr, you’ve created a highly customizable job application tracker that you can use to keep track of the jobs you apply to.

What is Softr
Softr is the easiest way to turn your data into powerful business apps—no code required. Connect to your spreadsheet or database, customize layout and logic, and share with your team or clients.
Join 700,000+ users worldwide, building client portals, internal tools, CRMs, dashboards, project management systems, inventory management apps, and more—all without code.
Join 700,000+ users worldwide, building client portals, internal tools, CRMs, dashboards, project management systems, inventory management apps, and more—all without code.
Get started free

Minnie Mururi


Categories


